Start your first channel backup
You only need three steps: register the channel, choose when it should run, and read the backup status.
Before you start
From your computer, open http://<NAS-IP>:<web-port>/ using the NAS
address and web port chosen during installation. Use
http://127.0.0.1:5173/ only for local frontend development. The
screenshots use the deterministic Channel Vault Guide example at
https://www.youtube.com/@channelvaultguide; replace it with a channel you
own. Channel Vault NAS is for archiving your own channels.
Step 1 — Register a channel
On Home, select Register channel. If you are already on Channels and another channel is selected, select Add channel at the top right.
- Paste the channel URL,
@handle, orUC…channel ID. - Select Check channel.
- Confirm that the channel name and source are correct.
- Select Register channel.
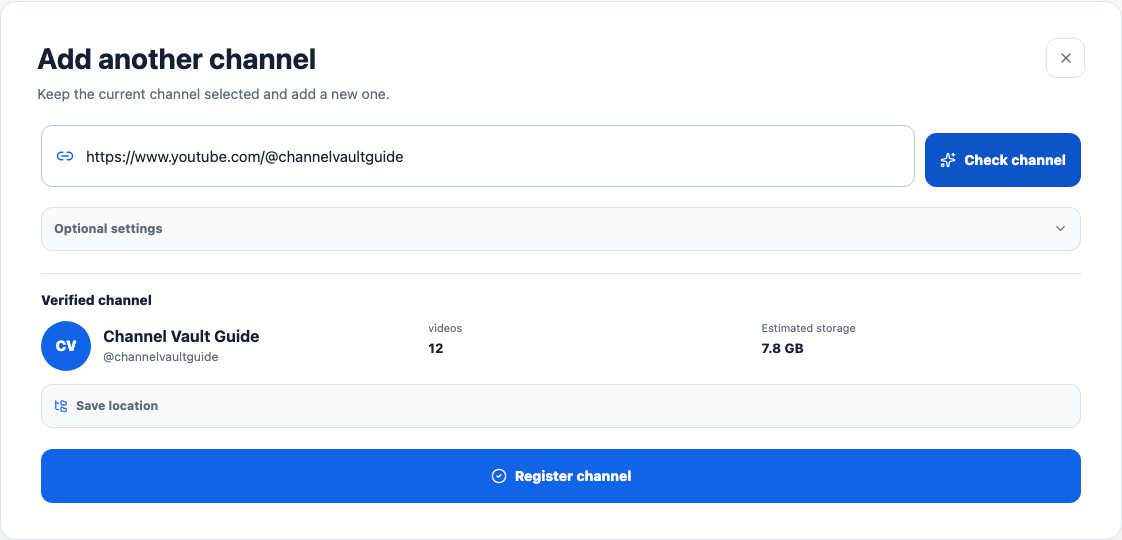
Nothing downloads yet
Checking and registering only save the channel. Files start transferring after you select Start automatic backup in Step 2.
Step 2 — Start automatic backup
The schedule appears as soon as the channel is registered.
- Choose All-channel check interval — how often Channel Vault checks for work.
- Choose Per run — the maximum number of videos to save in one pass.
- Select Start automatic backup.
- Confirm that the status changes to Automatic backup is on or Automatic backup is running.
If the remaining count is already zero, the same start action is labeled Back up future videos automatically. Select it to keep checking for new uploads.
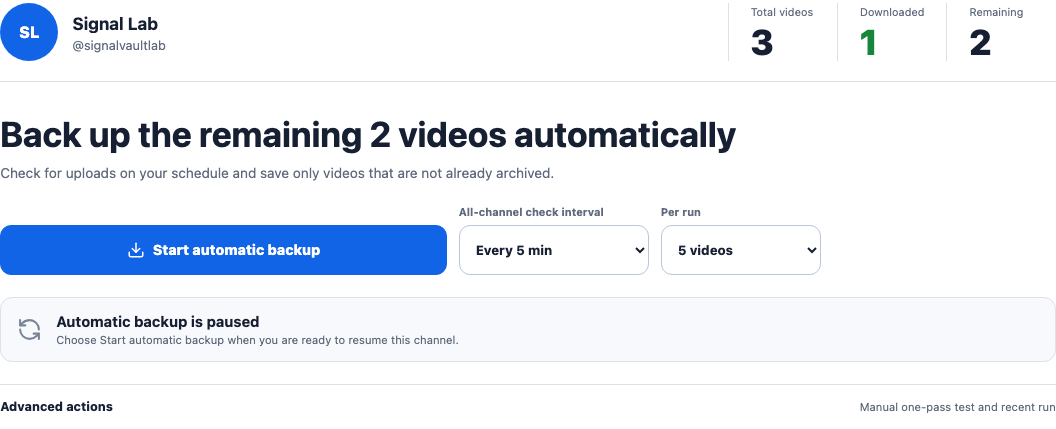
You can change the two choices later and select Save schedule. Select Pause when you do not want any new passes to begin.
This is the start button
Start automatic backup begins real transfers. If downloads are disabled for this installation, follow Enable real downloads and return to this button.
Step 3 — Read the status
Return to the channel at any time. Its main status tells you what is happening without requiring another screen.
| Status | What it means | What to do |
|---|---|---|
| Automatic backup is on | The channel is waiting for its next scheduled check. | No action is needed. Check the next-run time. |
| Automatic backup is running | Channel Vault is checking or saving videos now. | You may close the page and come back later. |
| Automatic backup is paused | No new scheduled pass will start for this channel. | Select Start automatic backup when you want to resume. |
| Needs attention | A download failed or the backup runtime needs a setting. | Select Retry failed when it is shown. Otherwise select Open technical settings and follow the highlighted setting. |
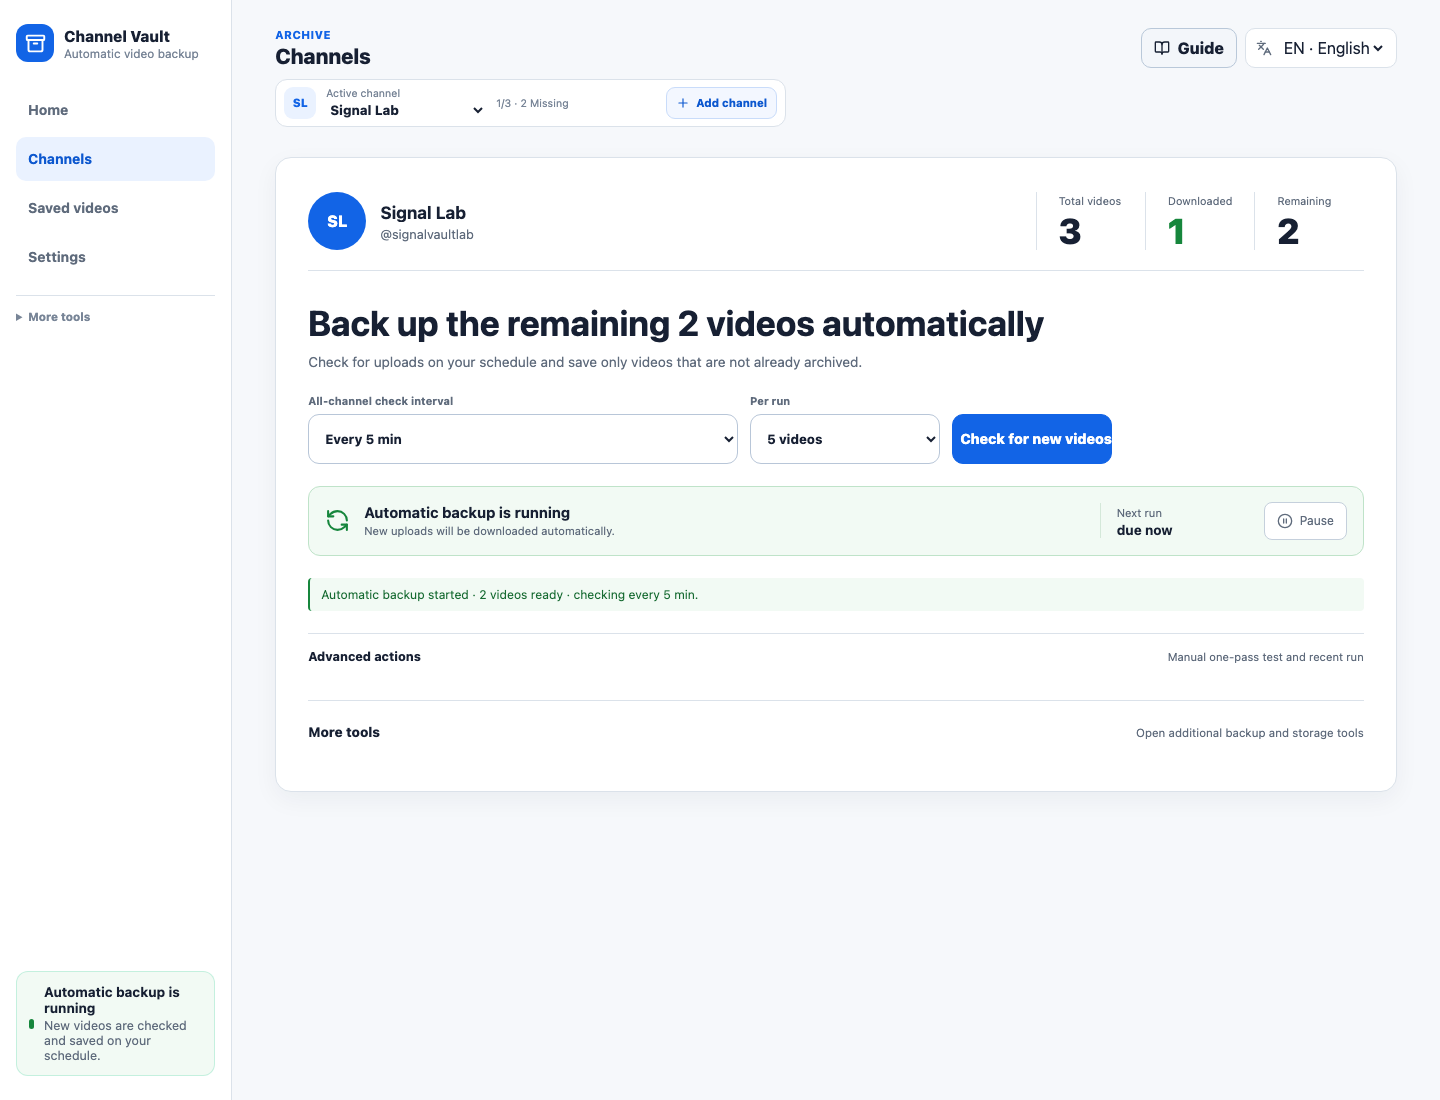
Your automatic backup is ready
When the remaining count reaches zero, the heading changes to Every video on this channel is backed up. Keep Automatic backup is on if Channel Vault should collect future uploads.
To add another channel, open Channels, select Add channel, and repeat these three steps.
Advanced management
The three steps above are all most people need. For troubleshooting, one-time tests, existing-archive migration, and detailed administration, continue to Advanced management.